
Treat ISMS risks
In the Risk treatment section, you see all risks with a gross risk of class 2 or 3. Here, you assign measures to an ISMS risk via the properties so that the risk can be reduced or avoided. For each risk, you can see the assets associated with the risk and the risk class before the measures. If you have assigned one or more measures to the risk, evaluate the net risk to determine the risk class according to the measures. Finally, evaluate here how the residual risk is handled.

Instructions:
-
Navigate to the ISMS risk by double-clicking on the corresponding object
Note: Alternatively, you can select the object by clicking on it and configure it via the properties without navigating directly to the object.
-
Open the Other attributes section in the Properties sidebar and under Tasks, reference the ISMS measure or central measure that is to be implemented
OR
Click More actions and then Create ISMS measure to create a new measure:

OR
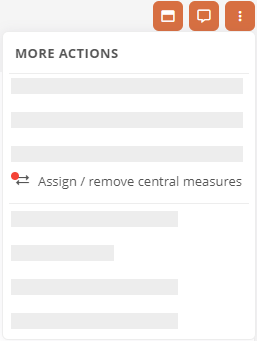
Click More actions and then Assign / remove central measures to reference a measure from the central measures folders:
Note: You can remove referenced central measures in the subsequent dialog using the Assign / remove central measures action.
Note: Central measures are all technical and organizational measures that apply company-wide and across all assets. These measures are no different from other measures within the ISMS, except that they are located in specific measure folders.
Note: You can then process measures directly via the Portal's task dashboard, which is also integrated into the ISMS app. You can learn everything about the task dashboard under Task management.
See also: For information on how to configure risk tasks, see Risk tasks.
-
Navigate back to the risk and reference one or more ISO 27001 measures in the properties under Controls to be executed, as appropriate, to demonstrate the relationship to the SoA
See also: Statement of applicability (SoA)
-
Navigate to the control to be executed by Alt + click and configure ISMS specific as well as general properties:
ISMS property
Description Attached controls Here you link the control to other controls. Assigned standard chapters Here you link the standard chapters to which the control refers. Target date Here you select by when the control should be implemented. Status of implementation Here you select the status of the control. See also: How to configure controls in general is described under Risk controls.
-
Navigate back to the risk and evaluate the risk impact in the properties under ISMS according to the measures at the confidentiality, integrity, availability and authenticity levels
-
In the ISMS area under Treatment residual risk, specify whether you accept, treat, avoid or insure the risk.
-
Switch to the Net assessment property section
-
Set the occurrence probability (net)
-
Set the remaining ISMS-relevant properties in the properties as required:
Property Description
ISMS Status Here you specify whether the risk has been assigned, assessed, treated or identified. Explanation of risk rating Here you can justify your risk assessment. Resubmission date Here you specify when the risk must be reassessed. Date of risk assessment Here you specify the date on which you created the risk. See also: All properties for configuring a risk are described under Create risk.
Results:
-
After you have defined the occurrence probability and risk impact in the net risk, the risk class is automatically calculated according to the measures. You can see the risk class in the table:

Note: Gross and net risks that have been incompletely assessed or not assessed at all are automatically assigned risk class 3.

-
After you have defined the occurrence probability and risk impact in gross and net risk, the risk is transferred accordingly to the risk heat map after the measures.
See also: The functionality of the risk heat map is described under Risk matrix.